
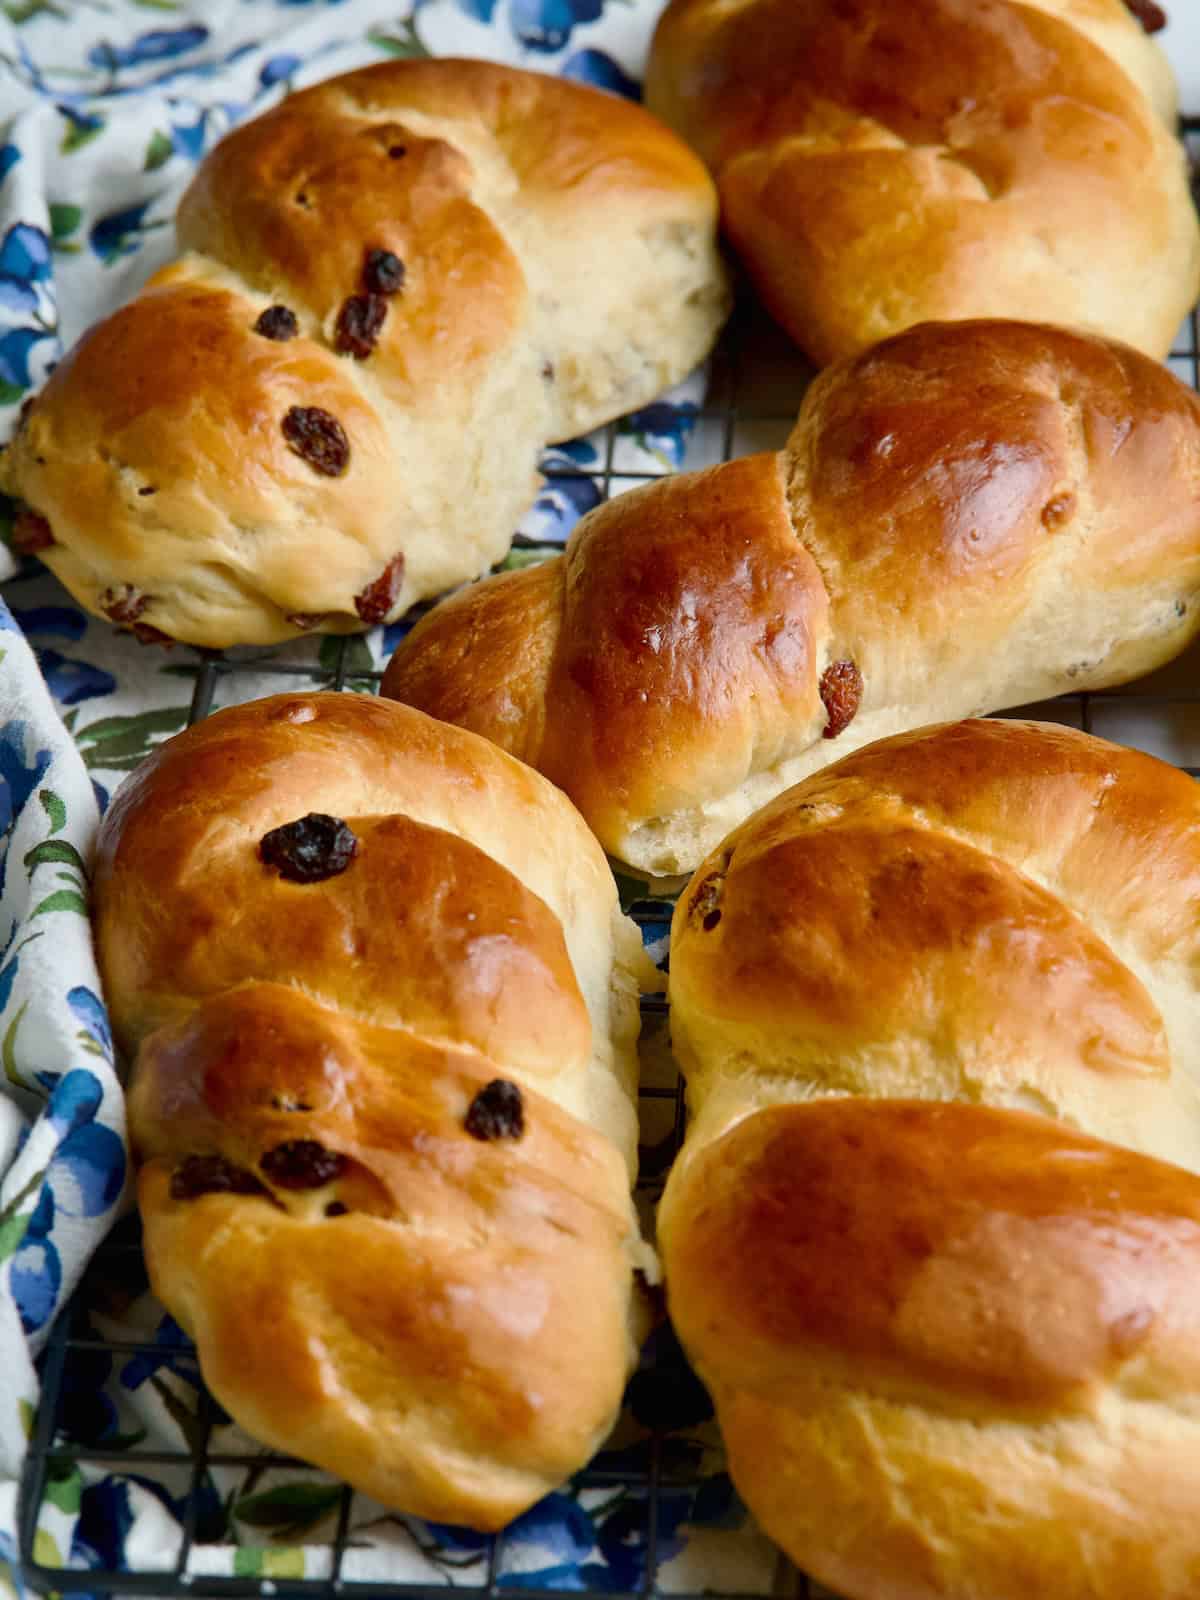
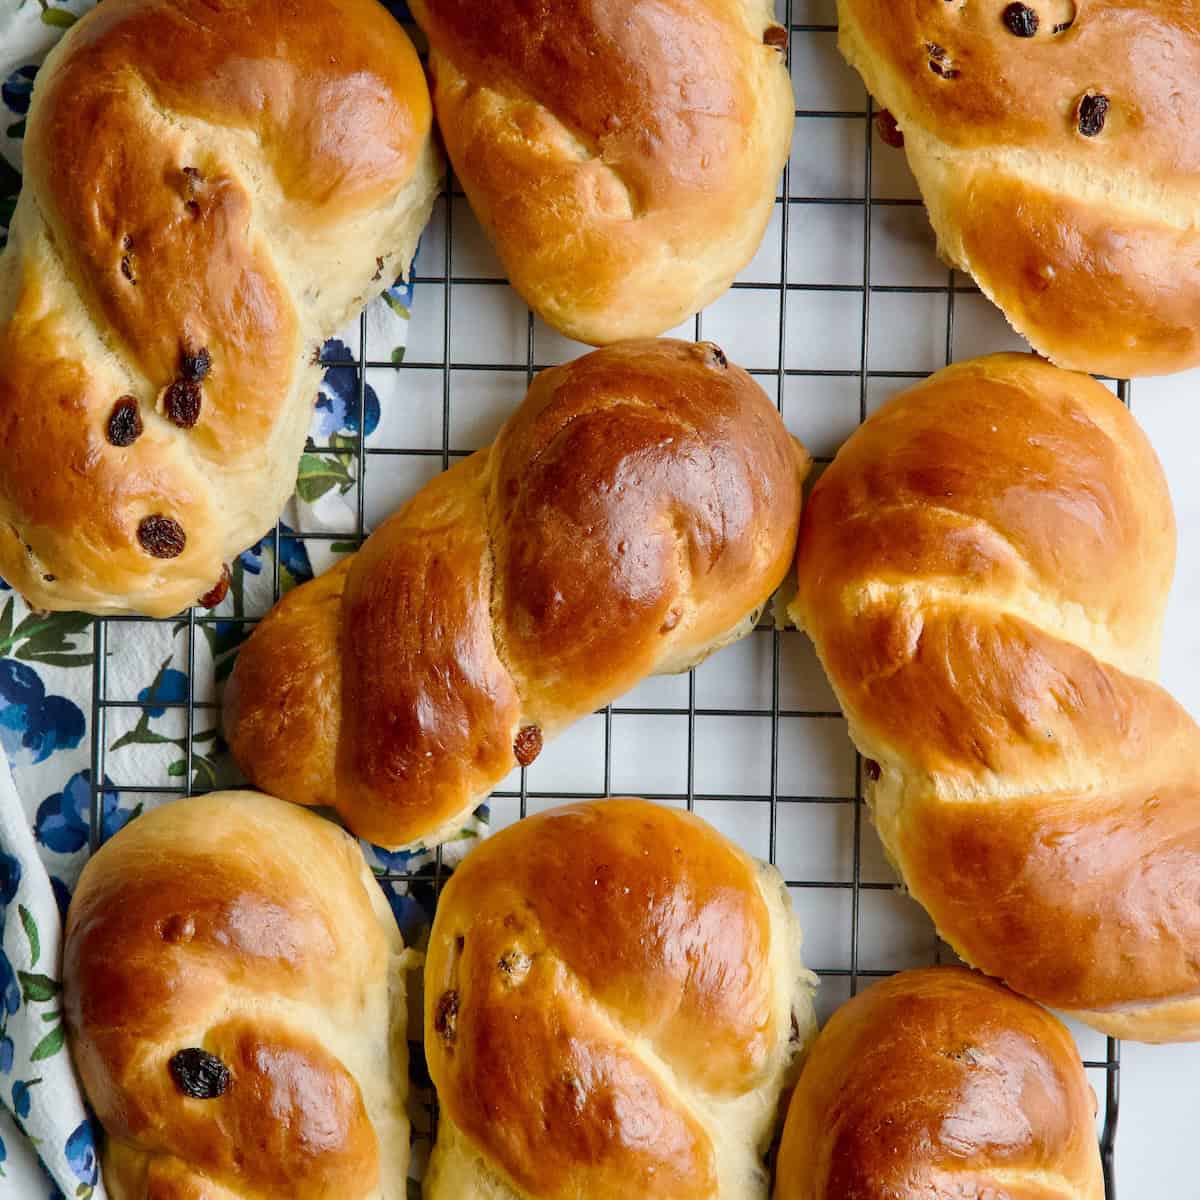
Soft and fluffy brioche braids with raisins that are simply irresistible! Perfect for snacking, lunchboxes, picnics, or days out, they’re a delicious homemade treat the whole family will love. Enjoy!
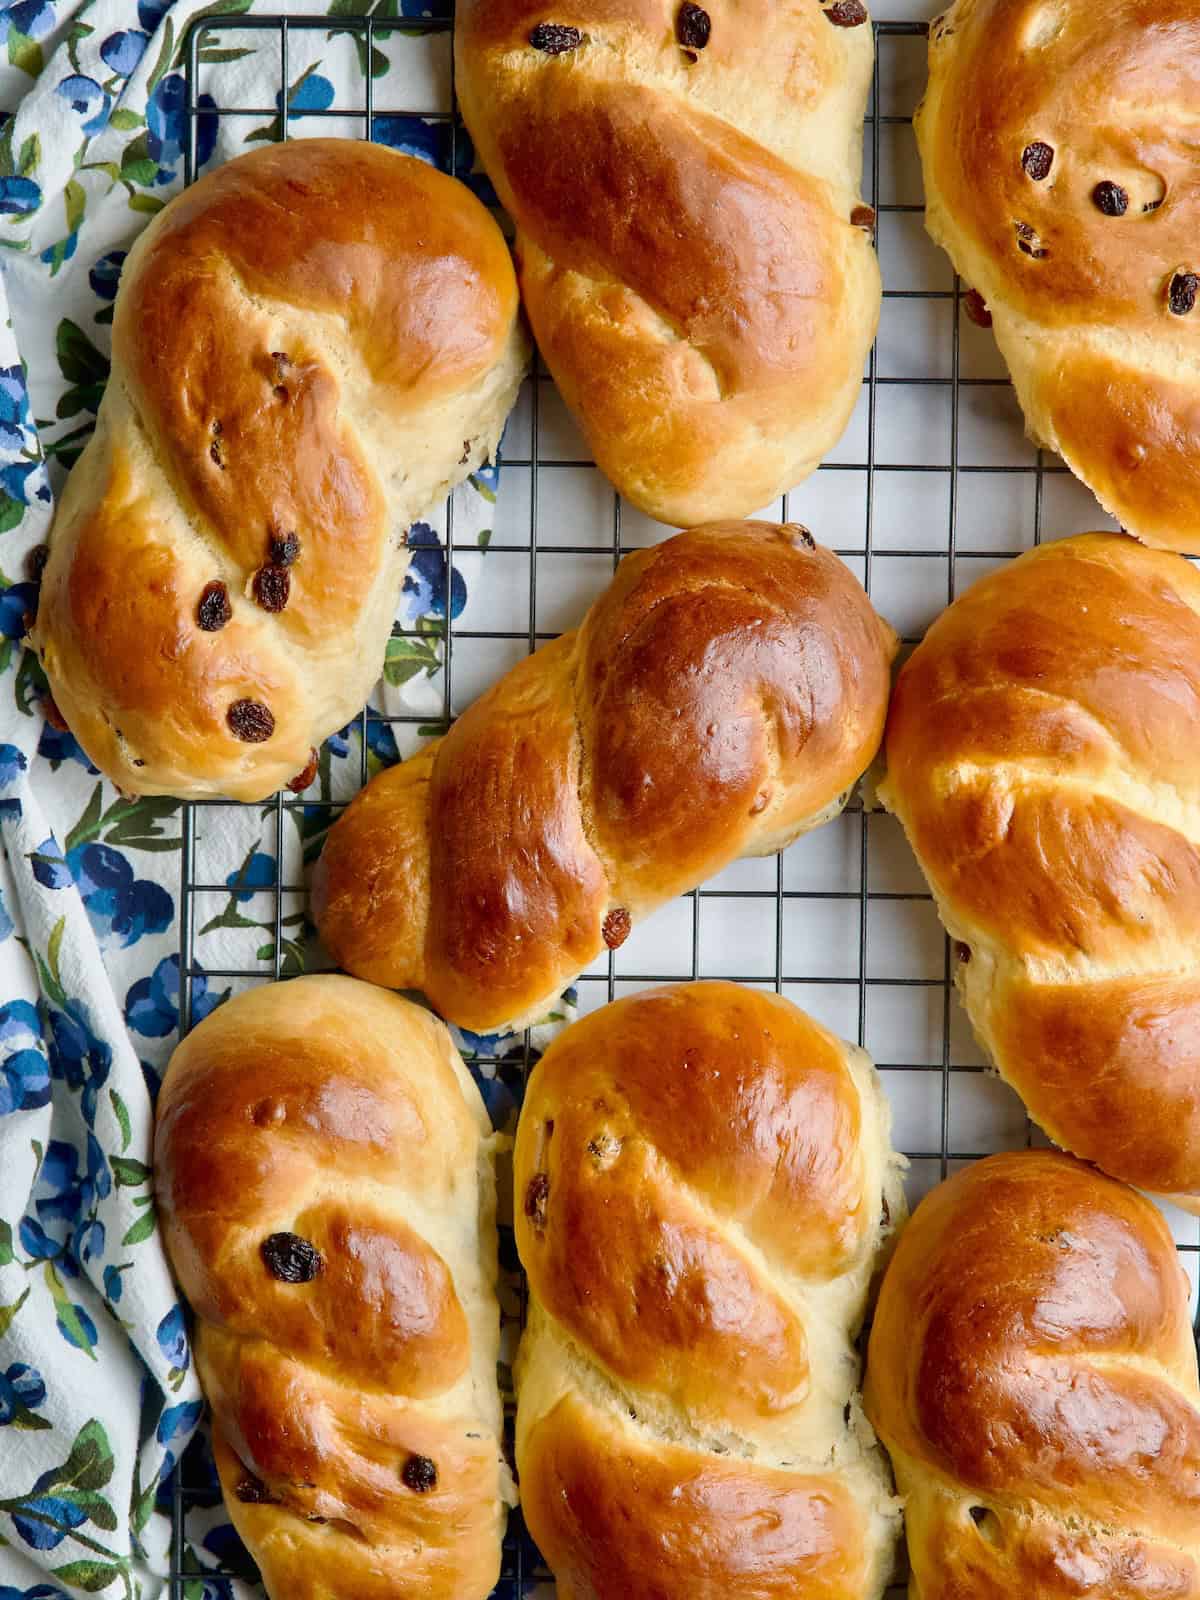
These homemade raisin brioche braids are so much better than store-bought ones! They're made without refined white sugar or preservatives, and the whole family is sure to love them.
They come out incredibly soft and fluffy, and you don't need any special baking skills to make them. Just follow my step-by-step instructions and let your stand mixer do all the hard work of kneading the dough.
I usually make two batches. One to enjoy for breakfast and snacks throughout the week, and another to pop straight into the freezer. That way, I always have something homemade and delicious ready for those extra-busy days when we need a quick breakfast or snack.
If your kids aren't big fans of raisins, don't worry! You can easily swap them for dried cranberries or chocolate chips, or simply leave them out for plain brioche braids. There's something for everyone!
I hope these soft, fluffy brioche braids become a family favorite in your home, too! Happy baking, and enjoy every delicious bite with your little ones. ❤️
Jump to:
👩🏻🍳 Why you should try my recipe
- Easy to hold with little hands.
- Freezable for up to 2 months.
- Perfect for breakfast, as a snack or lunchboxes.
- Can make them plain, with raisins or chocolate chips.
🥘 Ingredients
To make these delicious brioche braids, we are going to use all-purpose flour, yeast, milk, egg, maple syrup, butter and salt.
- Yeast: I’m using active dry yeast but you could also use instant yeast.
- Maple Syrup: For sweetness, I like to use a little bit of maple syrup. You could also use honey but not for children under 12 months.
- Butter: I prefer using unsalted butter when baking so I can control the amount of salt I add and keep the flavors nicely balanced.
- Salt: A pinch of salt is added for the whole batch of brioche.
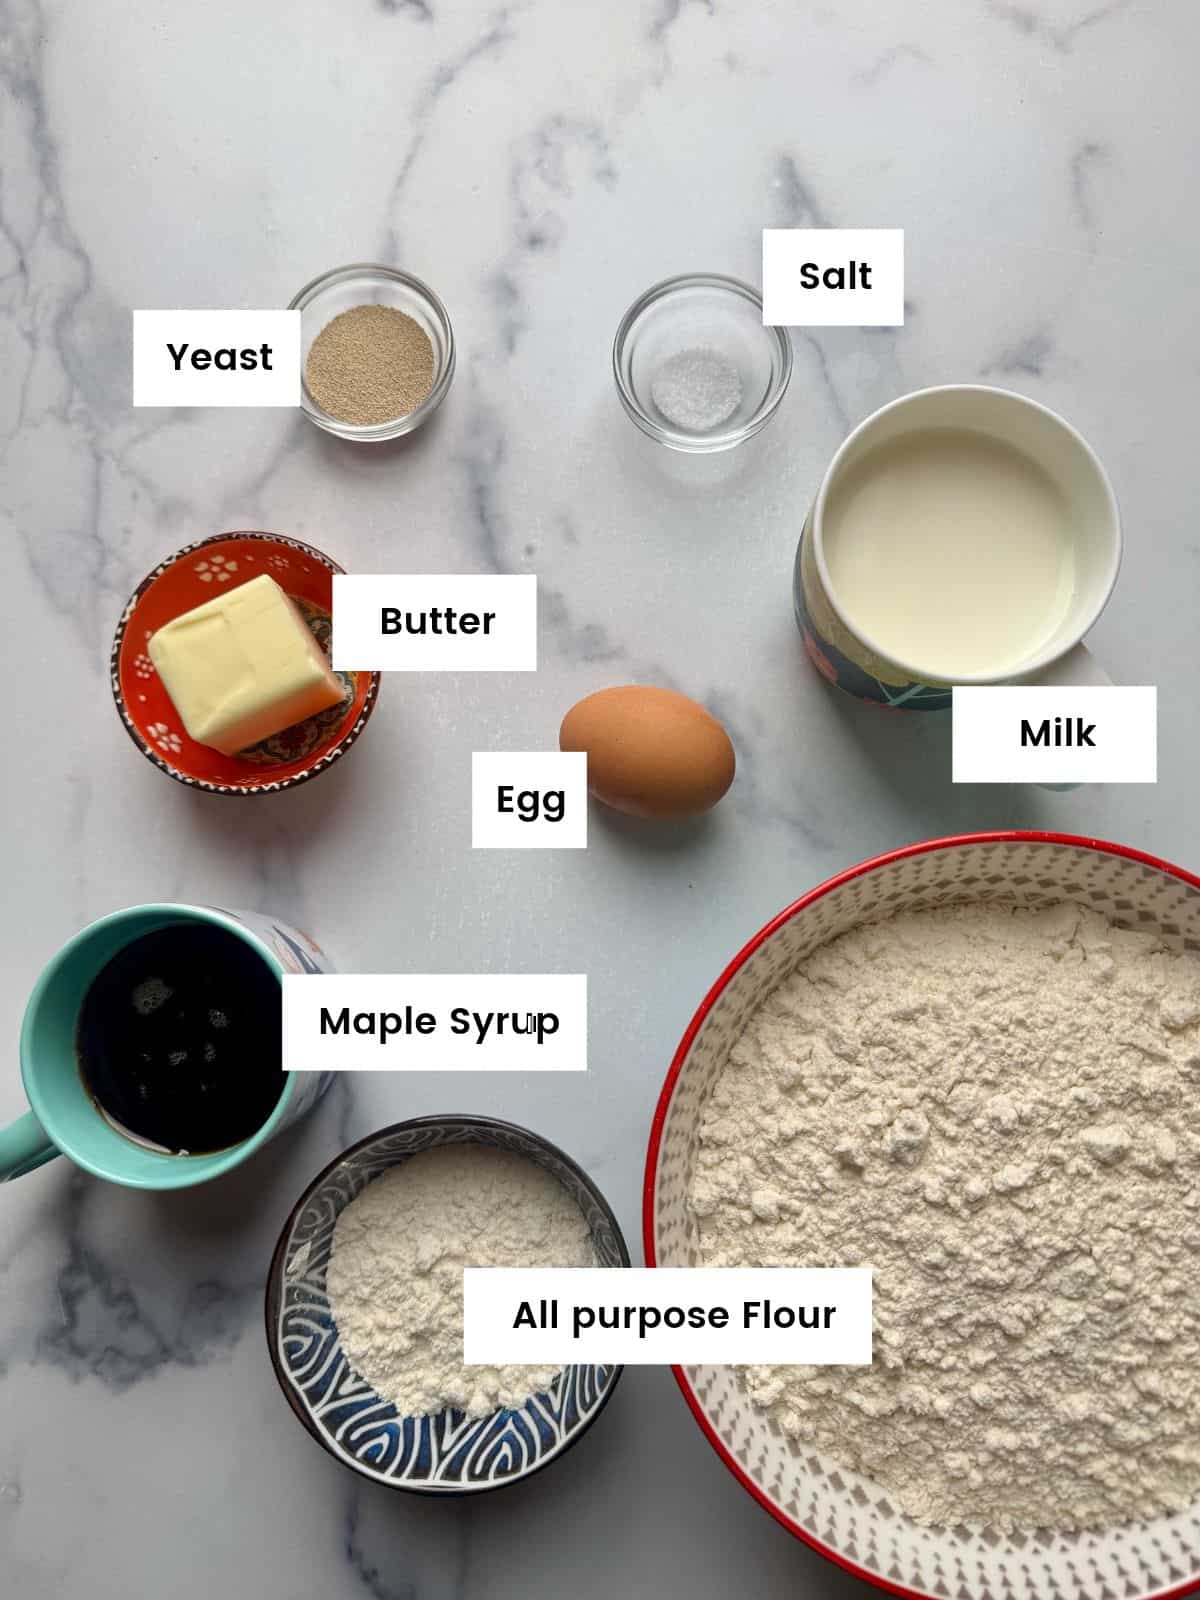
For full quantities and to print the recipe, see the recipe card below.
🔪 Step-by-step Instructions
So get your ingredients ready and let's get started!
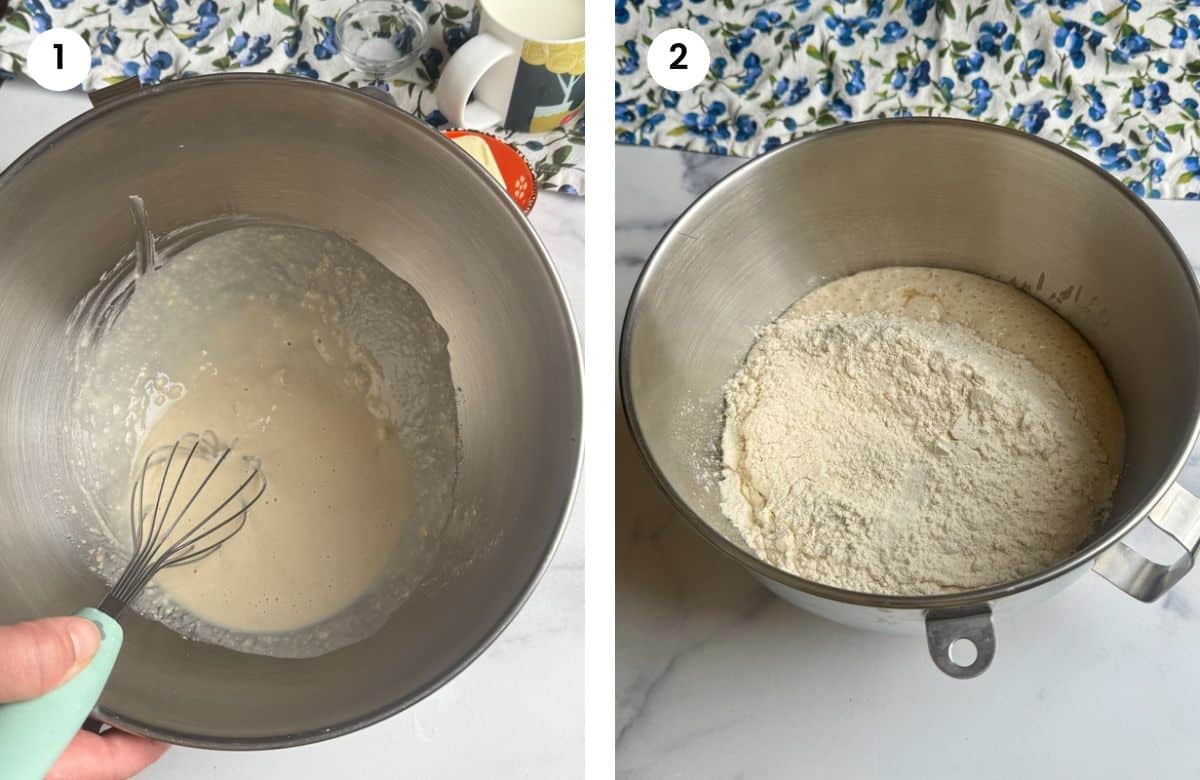
01. I start by mixing the yeast, lukewarm water, and about half a cup (62 g) of all-purpose flour in a bowl. I cover it with cling film and let it rest for 10 minutes to activate the yeast.
02. Next, I add the remaining ingredients, except for the melted butter. I mix in the egg, maple syrup, milk, flour, and salt until everything is well combined.
03. Now it's time to let the mixer do all the hard work! I knead the dough on medium-low speed for 5 minutes. You'll see the dough start to form a ball around the hook, but it will still stick to the sides of the bowl.
04. After 5 minutes, I start adding the melted butter, one tablespoon at a time. I let each addition mix into the dough for a few seconds before adding the next. This should take about 3-4 minutes in total.
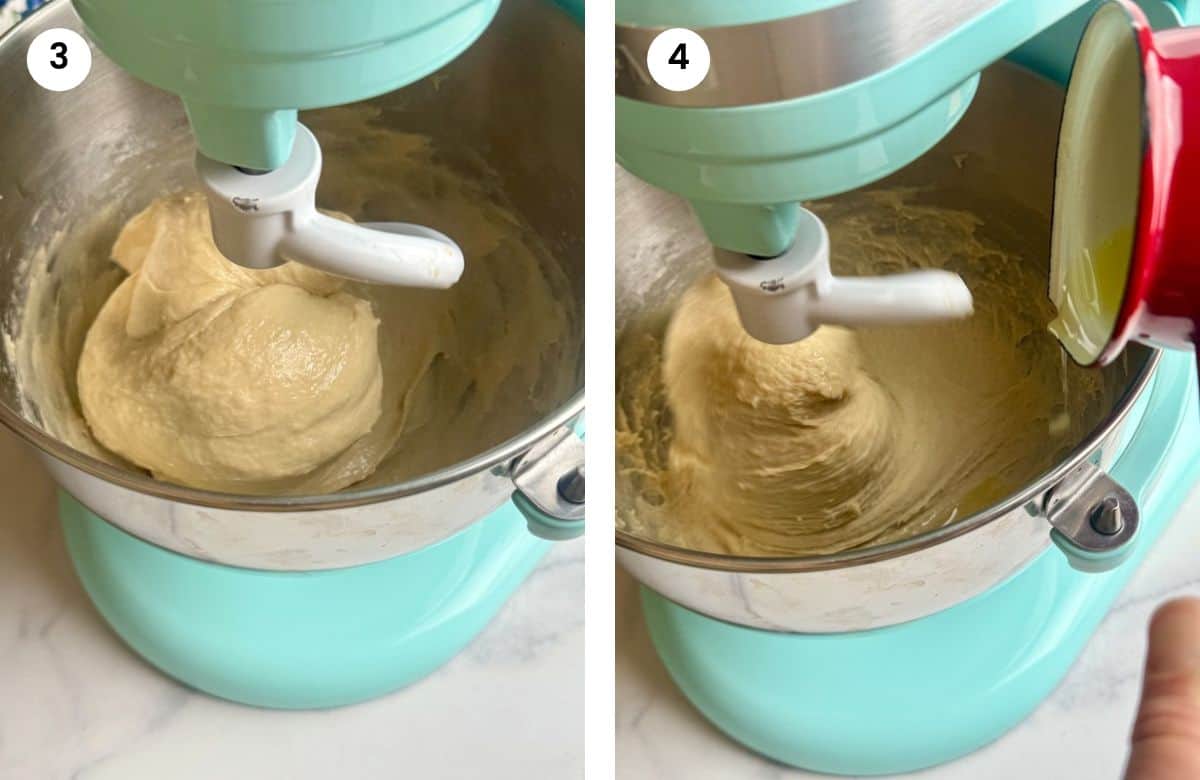
05. Once all the butter has been added, I turn up the mixer speed to medium-high and let the dough knead for another 5 minutes. You can use a spatula to scrape down the sides of the bowl as needed to help the dough mix evenly.
06. After 5 minutes, the dough should form a smooth ball. I cover the bowl with cling film and a clean kitchen towel, then leave the dough to rise for 1.5–2 hours, or until it has doubled in size.
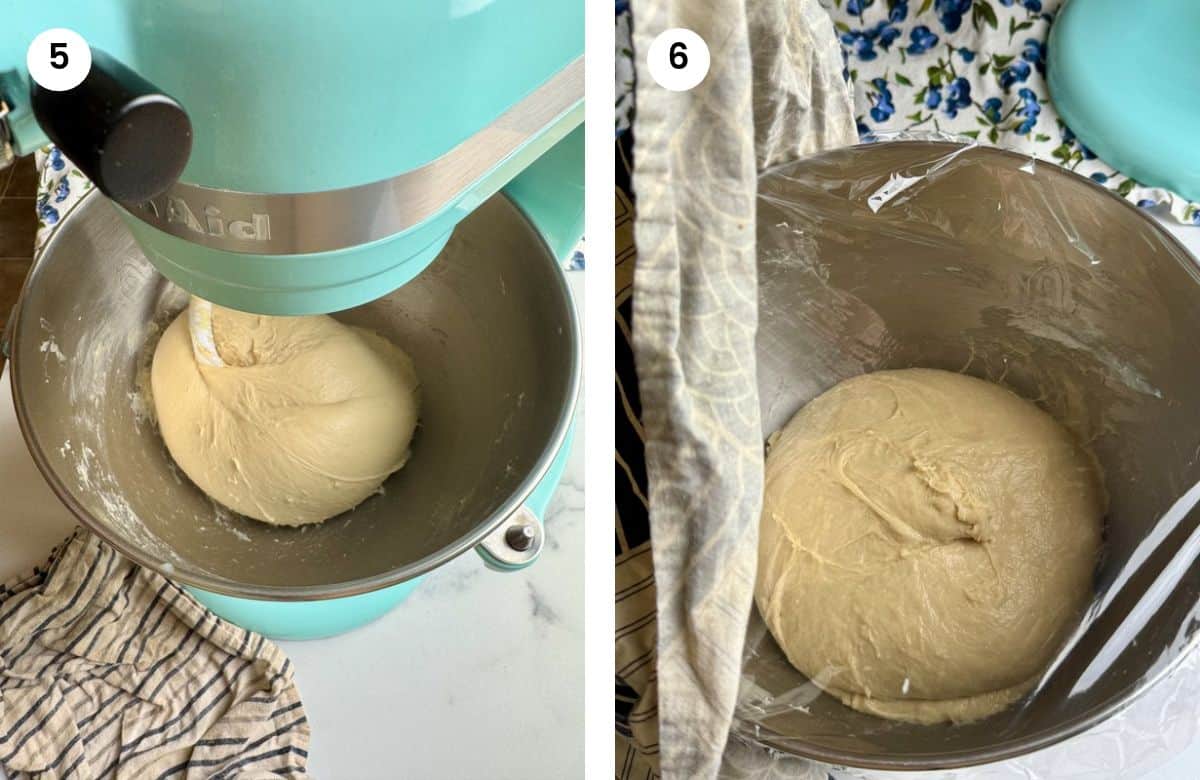
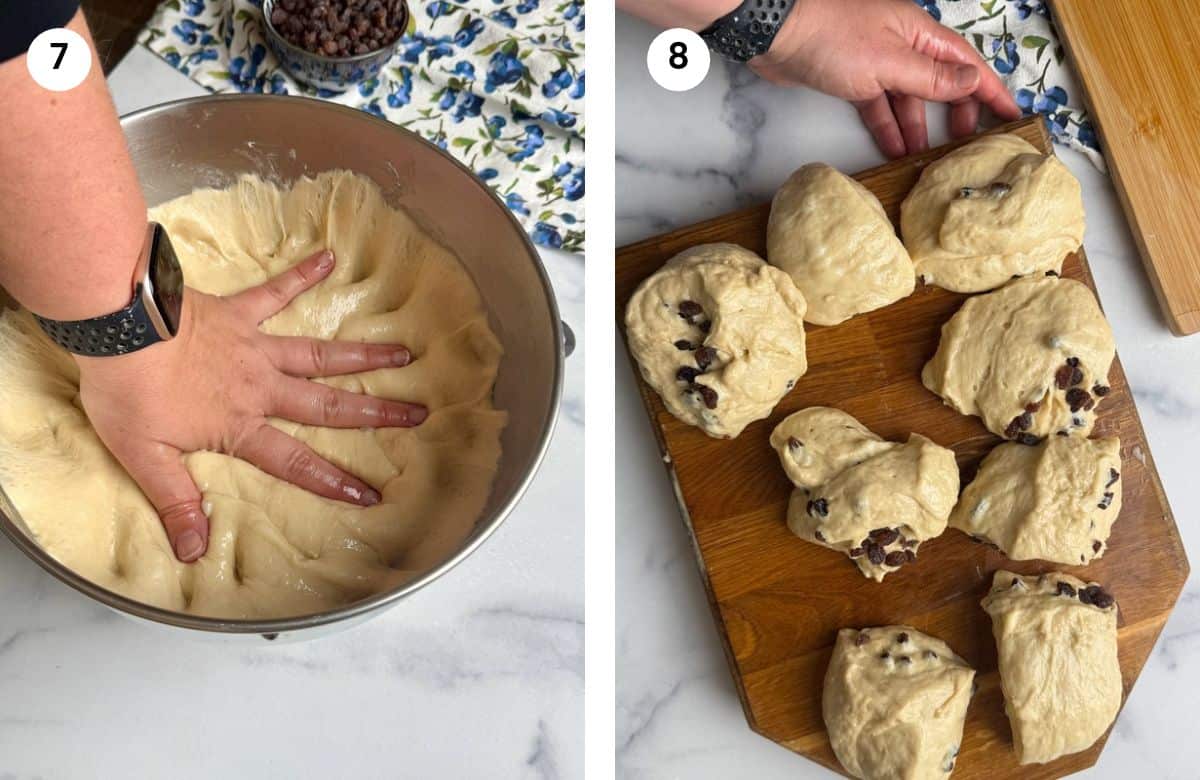
07. After the dough has risen, I add a little bit of avocado oil on my hands and working surface and punch the dough to deflate.
08. I transfer the dough to a lightly oiled surface, flatten it out, and sprinkle the raisins over the top. I knead gently until the raisins are evenly incorporated, then divide the dough into 8 equal pieces.
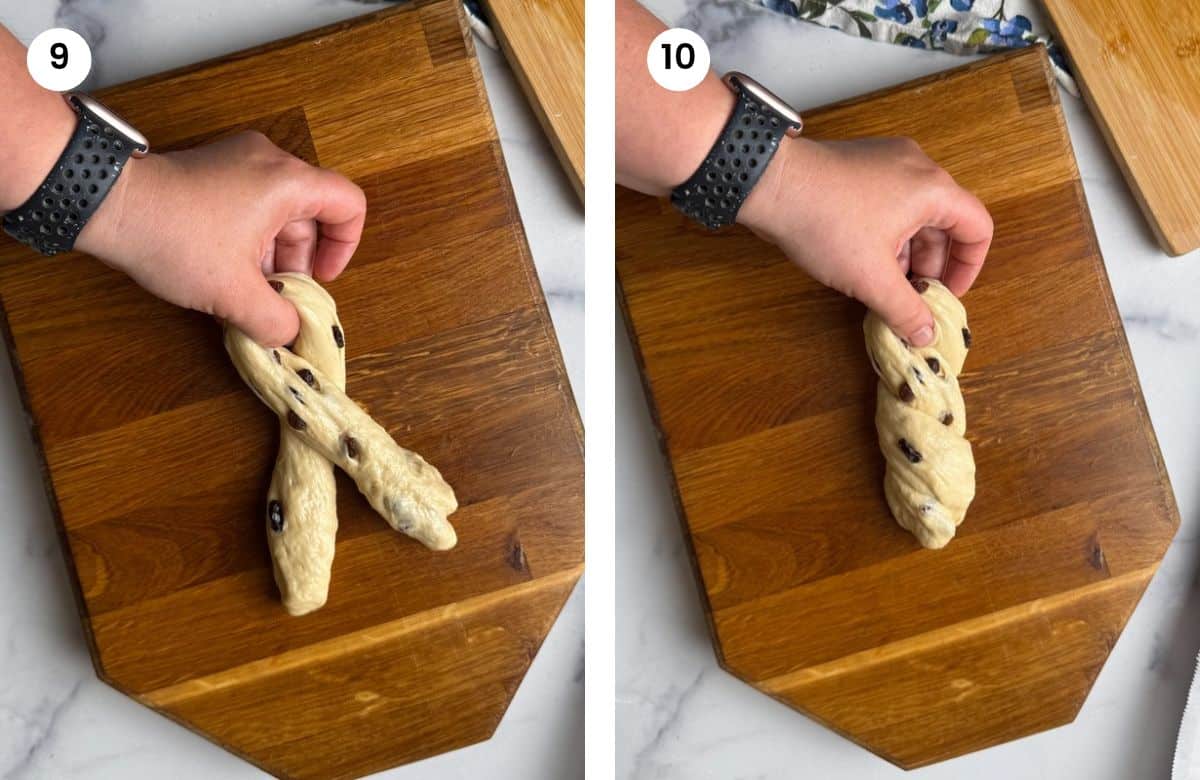
09. I take one piece of dough and shape it into a ball. Then, using my hands, I gently flatten it and roll it back and forth on the work surface to form a long rope.
10. I hold the middle of the rope and twist the two ends around each other to create a braid. You can also experiment with different shapes, such as a coil, or simply make a round bun if you prefer something easier.
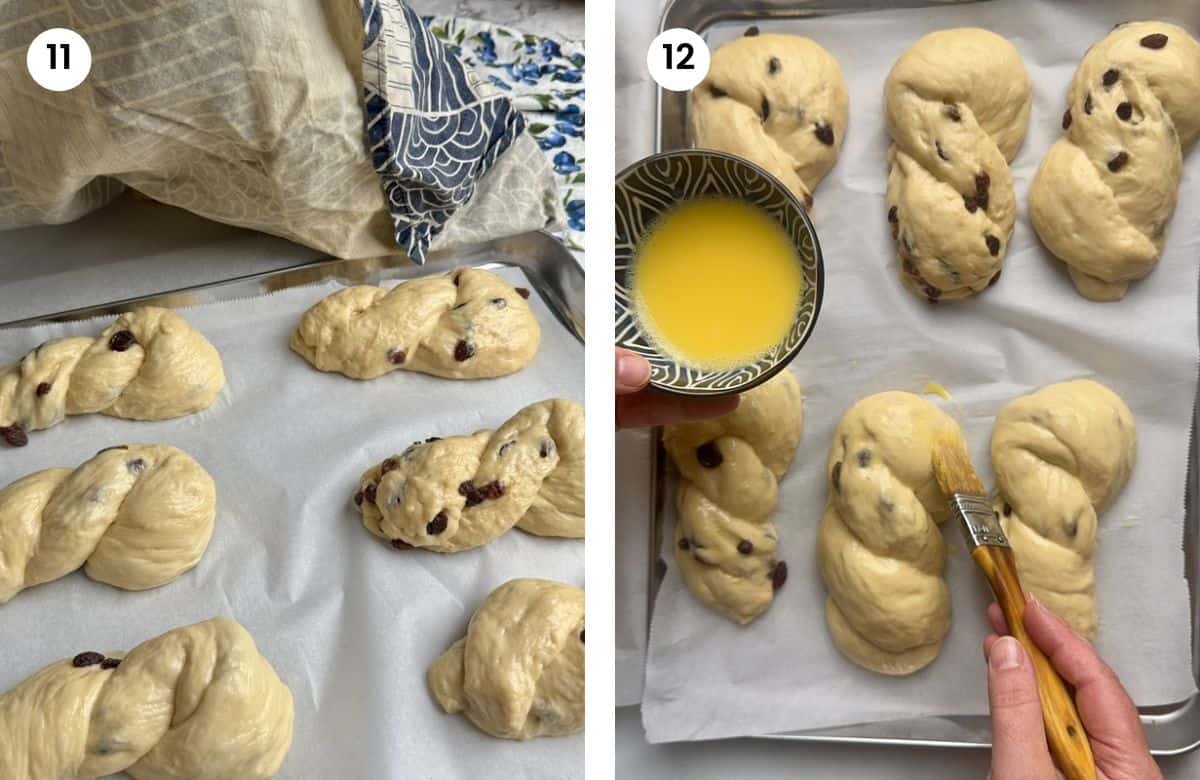
11. I place the brioche braids on two baking trays lined with parchment paper, leaving about 3-4 fingers space between them. Now it's time for their second rise! I let them rest for another 30–45 minutes, until they puff up nicely.
12. Before baking, I lightly brush the raisin brioche braids with egg wash to give them a beautiful golden-brown finish.
🍽 Serving Suggestions
You could serve these brioche with raisins as a snack, for breakfast, add them to lunchboxes or pack them for days out with your little ones.
🧰 Storage
You can store the brioche braids in a bread bin or bread bags to keep them fresh and soft. After a couple of days, they may start to firm up a little, but you can easily soften them again by warming them briefly in the microwave.
These brioche braids are also freezer-friendly and can be frozen for up to 2 months. I like to make an extra batch and freeze some for busy days! Simply take a couple out of the freezer the night before, and they'll be soft and ready to enjoy the next morning for breakfast or pack in the kids' lunchboxes.
❓ FAQ
If your children are not big fans of raisins then you could use chocolate chips or just leave them plain.
If you tried my brioche braids or any other recipe on my website, please leave a 🌟 star rating and let me know how it went in the 📝 comments below. I love hearing from you!
📋 Recipe

Mini Braided Brioche With Raisins

Ingredients
Activate Yeast
- 2 ½ teaspoons active dry yeast , 9gr
- ½ cup all-purpose flour , 62gr
- ½ cup lukewarm water
Brioche Ingredients
- 1 egg
- ½ cup maple syrup
- 1 cup milk
- pinch of salt
- 4 cups all-purpose flour , 500gr
- ¼ cup unsalted butter , melted
- 2 tablespoons oil for hands and surface
- 1 cup raisins
- 1 egg (for the egg wash) optional
Instructions
- In a bowl, add the yeast, lukewarm water and half a cup of flour. Mix to combine, cover with cling film and let it rest for 10 minutes.
- Add the egg, milk and maple syrup to the bowl.
- Add the flour and a pinch of salt on top of the wet ingredients.
- Knead using a mixer and the hook attachment for 5 minutes in medium speed. The dough will start forming a ball around the hook but still sticking on the sides.
- Add the melted butter, one tablespoon at a time waiting until it is absorbed before adding the next one. This step should taker 3-4 minutes.
- When the butter is all added, increase the speed to medium-high and knead for 5 more minutes. Scrape the sides with a spatula if needed. The dough should form a shiny ball around the hook.
- Cover with cling film and a kitchen towel. Let it rest for 1.5-2 hours until doubled in size.
- Oil your hands and the working surface. Punch the dough down to deflate. Lay flat on the surface and add the raisins. Fold and lightly knead to spread the raisins evenly.
- Cut the dough into 8-10 pieces. Shape each piece into a ball.
- Take one of the balls and roll into a rope. Hold the middle of the rope and twist the two ends around each other to create a braid. Repeat with the other dough balls.
- Place the braids on two lined baking trays leaving 3-4 fingers space between them. Cover with a towel and let the rise again for 30-45 minutes.
- Preheat the oven to 350℉ / 180℃.
- Mix one egg with a tablespoon of water to prepare the egg wash or you can use some milk. Brush each brioche braid with the egg wash or milk.
- Bake for 20-25 minutes until golden brown. Rest for 5 minutes then move to a wire rack to cool down completely.
Notes
- You could make them smaller and get about 12 brioche braids in one batch, but you will have to reduce the baking time.
Nutrition
🥣 More to try
If you liked my brioche braids with raisins, you should try some of these recipes too:





Julia Droulia
I really loved creating this recipe and post for you; I hope you make it and enjoy it as much as we do. Please leave me a comment here and share your feedback with a star rating as well